This is a small collection of information of the experience I've had modding a PS2. It's kind of a WiKi where I add information as it comes along. My previous experience comes from Xbox modding, reaching back to spring 2003. I bought a Magic 3.1 chip back then and tried to install it but failed and I left the PS2 scene for a while. In the ending of May 2004 I picked up and installed the DMS3 chip I had laying around, and this is where I am now. I started writing this page 22nd May 2004.
PS2 Version: SCPH-30004 (PAL/EUR 0120) - v3
Accessories: Network Adaptor (ethernet only), 2x Original 8 MB Memory Cards, 2x Sony DualShock Controllers
Harddrives: Seagate 10 GB (hdd tool reports "invalid argument" when formatting, works with Outbreak), Hitachi 40 GB
DMS Hardware Version: 2.0
DMS Current Flash Version: 2.0 (v2.2 causes problems with originals)
DMS Backup/Original Flash Version: 1.3
DMS Config Version: 1.0
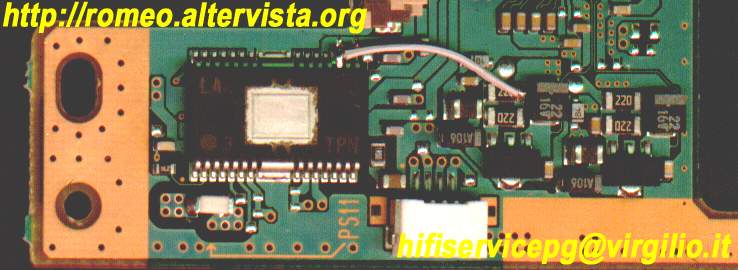
Pictures of my PS2 v3 with DMS3 (the above) modification
Pictures of my PS2 v7 with Duo modification
Pictures of my PS2 v3 gap with Duo 2 SE modification (2004-12-14)
DMS3 installation diagrams [local mirror]
DMS3 v3 diagrams [local mirror]
DMS3 installation tips and practices
DMS3 Hardware Changelog
(Credit to cyber-mag.com)
The V3 stations are relatively simple to disassemble (but hard to mod), whilst the V4 to V8
stations are harder to access the connection points (but easier to solder to).
PS2 Differences - Visually inspect every PS2 version released and see how they relate to eachother
(Credit to Diode)
http://www.aaroncake.net/electronics/solder.htm
http://www.epemag.wimborne.co.uk/solderfaq.htm
this link is for suface mount soldering, like 90% of ps2 comps
http://xanadu.ece.ucsb.edu/~long/ece145a/SMSoldering.pdf
(Credit to ps-sed off)
Reflowing is where you flux all the legs on the chip and either touch with the iron or using
hot air (not a hair dryier!! a hot air rework station) this allows any possible bad connections
that you cant always see to be made good again and can remove small shorts or solder splahes.
(Credit to SlinkyDink)
While I was looking over my Physics II notes from last semester I thought about wiring modchips.
Making the wires turn at 90 degree bends actually creates more EMI than if the wire was bent at a
curve. So ironically this good looks is not so good from an electrical standpoint. Everything else
about these pretty installs is good from an EE standpoint (such as short parallel wire runs, and
keeping the wires close to the board)
But, since this added interference is so little it doesnt matter in the actual functionality of
the chip. But I always chuckle at aspects of these fancy installs because they look like they
should work better (but don't necessarily mean they do).
PS2: Soldering tips, required tools, and tricks for the fiddly bits [cyber-mag.com] - VERY handy
Solders, fluxes, and solderability [tutorialsweb.com]
How to solder - simple guide and shows common faults
Soldering Guide - step-by-step instructions
solder type discussion
(Credit to mjhloomans)
FPGA stands for Field Programmable Gate Array and although that name describes exactly what is
inside, I can image that many non-electronic people might look like this: Field Programmable Gate
Array? Yeah whatever
I will try to explain in laymans terms. An FPGA contains a lot of cells. Each of these cells contain
some logic. These logic elements are the very basic type like an AND gate, OR gate, Flip flop etc etc.
(check the web if you don't know what they are). If you buy an FPGA all these cells (and the logic in
them) are not connect to each other at all!!! So if you go to Farnell and buy the exact same Actel
FPGA as on your DMS3 it will do nothing. Absolutely nothing.
The trick in programming an FPGA is that you can connect these cells (and the logic in them) together.
It's like wiring up different components inside the FPGA. The netlist describes how the cells are
connected together and therefore determine its function!!!!!! The netlist also describes which and
how the cells are connected to the pins on the outside.
This is why a FPGA is so powerfull. I can buy a certain type of FPGA and program it as a modchip
(like DMS did) or program it as a running light for my knightrider car. Be creative I would say.
This also means that the number you see on the Actel FPGA only tells you what kind of cells are
inside and how many. It says nothing about how these cells are connected together. The FPGA that
the DMS3 uses has for example 75000 system gates, 3072 registers, 27kbit of RAM, 12 blocks of 256
9bit RAM, two phase locked loops and 158 input/output pins. So you can image connecting all of these
together in exactly the right way to make a modchip is not that easy.
( For more info on the Actel ProASICplus APA075: http://www.actel.com/products/proasicplus/index.html )
So if you have to change your design you can reprogram your FPGA with a new netlist. (This is different
from reprogamming your flash, stay with me guys!). I think this is what DMS did. The changes from v9
to DMS3+ are in the FPGA only. A different way of connecting the parts inside of the FPGA. No change
to the little circuit board at all. So why throw away the v9 board if it is exactly the same as the
DMS3+ circuit board? Because it says v9 on it? Well they solved that problem by pasting a small + over
this. And that is the sticker everybody is peeling of in this threat.
(Credit to Zer0-X)
Quote by crazyc:
How do the mod chips tap the bus and inject their onboard binaries?
Wish I knew. I can only assume since the only lines connected to the BIOS are Output Enable and
data0-7 that the OE-signal is used as a clock and normally the chip is monitoring what the BIOS is
sending to the bus to see when it has to disable the BIOS by forcing the OE-line and then sending it's
own data to the bus. During this operation, if certain mode is selected in DMS4 it sends some program
to the memory instead of what the BIOS was supposed to send and then the system propably starts this
program thinking it came from the BIOS. A bus sniffing equipment would come handy recording that piece of data.
(Credit to automan)
(ICE Final) i want something to say about bootrate guys...finally it depends on the sx28 not only on the
code...50 mhz clock is not enough to get the sx28 synchronized perfectly on the data stream within the ps2,
you see ?...syncronizing is needed to inject patch code perfectly...that's why we added the 74hc73 to
point 'A' who is capable to syncronize up to 200 mhz...that's why FPGA based chips like the MI have 100 %
bootrate...those FPGA's can synchronize on data streams up to 300 mhz and more perfectly...you have to
think about what you want...a cheap solution with 60 - 80 % bootrate or an expensive solution with a 100 %
??? how often do you or your customers changing media ?...
http://www.psrtech.co.uk/fuses.htm [local mirror]
Key information:
- Must support UDMA4 and SMART commands
- Set jumper to MASTER
- Recommended size of harddrive is 40 GB
- PS2 Network Adapter required ($39)
- To add HDD support to your program you need libHDD
I've created a dedicated site just for hard drives and compatibility with the PS2:
PS2 Hard Drive Compatibility Chart
There are three ways to format and setup a harddrive:
Tutorial using psownz's hdd tool, worked for me but sub-40 GB disks generates an error message:
http://www.maxconsole.com/?mode=tutorials&feed=ps2&itemid=72
You can't load the Sony HDD Utility disc (1.0/1.1) with the chip activated, neither does it work with a backup of the disc since it uses DNAS. This means that without the official Sony-HDD you can't take advantage of the updated Sony browser/broadband navigator with new hdd support, or copy save games from memory card to harddrive. These tools has to be developed on a 3rd party level (PS2Menu-k).
Update: Apparently the FFXI beta HDD Utility Disc 1.00 that came with the beta FFXI package last year works with NTSC consoles with the DMS3 chip using these settings; MM16 disabled and ATAD-patching enabled. There is a ppf patch that should patch the image for use on a unmodded PS2, but people report that it only patches the first atad.irx file. Source [ps2ownz.com]. List of official PS2 peripherals.
(Credit to bungiefan and bungiefan)
The one thing keeping you from using your own hard drive with the PS2 is that Sony customizes the BIOS of their
HDD units and their HDD software looks for that customization. So far, I've seen Maxtor DiamondMaxes, IBM DeskStars,
and Maxtor Fireball 3s used as Sony HDD units that other importers obtained. I've also heard rumor that some peoples'
HDDs are Seagates. Mine is a Maxtor DiamondMax.
Sony uses 40 gigabyte, 5400 RPM, IDE hard drives as their HDD units. Linux doesn't look for the custom BIOS, but
games do. So with a Linux Kit you can swap in your own hard drive, but with PSBBN or the HDD utility disc, you
have to use an official HDD until someone figures out how to patch the BIOS on a store-bought hard drive to match
Sony's custom BIOS. (ivc: DMS ATAD patching enables you to use hdd-enabled games with a non-sony drive)
(Credit to bungiefan)
PSBBN checks the firmware of the HDD and Sony customizes the firmware of their HDD units. Until someone manages
to crack the firmware and make it so you can put the changes on your own hard drive, you need an official HDD
unit from Sony to use with games. (DMS ATAD patching enables you to use hdd-enabled games on non-sony drive)
For PStwo slimline consoles, there's now a special harddrive adapter you can solder to the circuit board and get the same harddrive features as on the old versions. It's called HD Connect and made by Team Xtender. Here's a small review i found.
Resident Evil: Outbreak - HDD Install
Note: Find a working and proper tested disc/media that works without any mod installed or works on another PS2 unit before going any futher with CD/DVD-drive troubleshooting.
(Credit to Aussie Acue)
laser repairs [cyber-mag.com] - very detailed and easy to comprehend
(Credit to Messiah2 pdf)
PS2 backups/imports won't boot or Red Screen Displays
This disc is seen (grooves is found and focus established) but the PS2 has been unable to identify it as a valid
disk type (Audio/DVD/PS1/PS2). If all backups won't boot, then try cleaning the laser lens with a cleaning CD.
If it's just DVD-Rs that won't boot, suspect wire E (dms: S), wire W (dms: E, also check D cause it's mentioned on
the same subject as wire R) or the DVD laser diode (which may need recalibration, (read: pot tweak).
'Disc Reading' on Browser Screen or clicking sounds
The disc is seen (groove is found and focus established) and the PS2 has been able to identify it as a valid
disk type (Audio/DVD/PS1/PS2) but cannot do anything more with the disk or takes ages to load. This is most likely
a laser related issue (clean the lens and/or the disc). Or recalibrate the laser. If the drive seems to load
sluggishly (like it seems not to have enough power which is not the case), particularly in PS1 mode, check wire
SCEx (dms: X).
Screen remains black
Assuming that the electrons where whriling initially, then this is usually a mis-install on the BIOS, often MNOP
(dms: JKMN). If the electrons never happened, then some wires likely snagged when you put the PS2 back together
and possible a fuse has blown (one of those little square chips with a numer on them). If you have a memory card
inserted, try removing it. If it doesn't boot when inserted, it might be accompanied by a loss of controller
vibration. Please examine fuse at PS7 marked with legend S7.
(Credit to ninja)
I have installled a dms3 v9 chip in a euro pal v10 console and the sound is unstable, it sounds like when you try
to play a very scratched cd in a cdplayer and also some times it turns to a solid constant beeep.
http://stupid.unx.nu/filer/ps2_v10_dms3_installed.jpg
(Credit to dms)
v10 seems to be a little more sensitive. Please keep the clock wire as short as possible and wrap a wire around
it which is grounded at both ends, this should reduce signal noise.
(Credit to tot31)
Most v5 are using 400R lasers and some v7 use 400R and 400C lasers. 400C and 400R lasers are not interchangeble.
It can only be changed by using lenschanger program. V9/V10 is using LA6508 chip and v5/v6/v7/v8 is using BA5815FM
chip. These 2 chips control tracking and focusing the lens. If LA or BA chip is burnt, there will be no video and
audio. Check the the ribbon cable that connects from the lens to the mainboard. I've encountered this problem before
and after I change the ribbon cable it was fine.
(Credit to gemat)
the feedback [laser system] tells the LA to increase the voltage, but there is a limit to that due to the LA's supply voltage.
I you put a big resistor [or switch from 12v to 5v], the current that the Vmax causes, is not enough to burn the LA
nor the Coil, but the lens deviation will not be enough to keep the disc reading....
(Credit to romeo)
Possible mode for V9 and V10 dead prevention: Change supply on pin 17 from 12 to 5 Volts. Cut Track or lift pin.
Needs to change PS11 and PS13 with 750mA fast fuses. If you want to try...
This solution is for prevention, not for repair. To repair needs to change LA and/or laser coils (Tracking).
LA have two supplies, pin 13 (need 12V and drive/sled motor) and pin 17 (don't need 12V and drive coils). Changing the
supply on pin 17 from 12 to 5 Volts you reduce the maximum voltage peaks (Vpp) of the laser coils, from 16Vpp to
about 6 Vpp. I hope this prevent coils and LA damage. The modification apparently don't change the reading performance,
me and others Italian friends have tested this modification in about 30 V9-V10 machines at this moment.
The LA (and the LB) is supplied with 12V, non with 8V. Sure, LA is connected to 7808, but is connected to the INPUT
pin (left) not to the output (right). If you want to verify, place a multimeter between PS11 and GND, you will read
12V, not 8V. The 7808 supplies the joypad vibration. I have tested the peaks on laser coils with oscilloscope.
I speak in a terrible English, i know, but i speak about facts, not about theory.
Top picture Bottom picture
Coil resistance explained: thread 1 [local mirror],
thread 2 [local mirror]
Ripper Team: Dead v9 story PDF
Matrix Team: v12 fix
Ripper Team: v12 deaf beef PDF
DMS troubleshooting (bottom)
http://www.psxservices.co.uk/ps2_version.htm
http://www.chipzone.com/versions.cfm
DMS Flash Changelog
DMS3 v1 chip released (2003-02-17)
DMS Upgrade v1.1 (2003-02-17)
DMS Upgrade v1.2 (2003-02-26)
DMS3 v2 chip released (2003-03-18)
DMS Upgrade v1.3 (2003-05-08)
DMS Upgrade v1.6b (2003-07-13)
DMS Upgrade v1.6c (2003-07-14)
DMS3 v9 chip released (2003-11-16)
DMS Upgrade v1.8 (2003-11-16) [ISO] [Nero ISO]
DMS Upgrade v2.0 (2004-02-05)
DMS Upgrade v2.2 (2004-04-05) [ELF only]
DMS3 Plus chip released (2004-06-30)
DMS Upgrade v2.3 Beta 0 Release (2004-06-30)
DMS Upgrade v2.3 Beta 1 (2004-07-01)
DMS Upgrade v2.3 Beta 2 (2004-07-01)
DMS Upgrade v2.3 Beta 3 (2004-07-05)
DMS Upgrade v2.3 (2004-08-10)
DMS Upgrade v2.4 Beta 0 (2004-10-06) [ELF only]
DMS Upgrade v2.4 Beta 1 (2004-10-08) [ELF only]
DMS Upgrade v2.4 Beta 2 (2004-10-09) [ELF only]
DMS Upgrade v2.4 Beta 3 (2004-10-13) [ELF only]
Note: I got reports that you can't downgrade lower than the default firmware.
PS2 Applications
PC Applications for PS2
(Credit to fluke2k)
The *.irx files is compiled for the IOP processor in the PS2 (co-prosessor) and the *.elf files is compiled for the EE. (Emotion Engine e.g. PS2's main CPU)
(Credit to Rotosound_rb666)
"Magic Gate" is nothing more than 96kb of extra optical reader data squeezed between the barcodes and
readable print on that extra insde ring STAMPED originals have so the industry would have a place to put
readable print IN the disc so you can see and read what the disc is, even if unlabled... Sony invented
the optical reading compact disc so they cheated in the hardware, only in that ALL PlayStation conoles
ever made actually track beyond the the inside of the readable section and look for their "Magic Gate"
code where no other reader would bother, there's nothing there except for "Magic Gate", and since theres
nothing there on recordable discs, and no recorder that could reach there if there were, anyway, it's not
reproducable exept by STAMPING them at the factory, and THAT's why "Swap Magic" works at all, and all it
actually is, a stamped disc with something there on that inner ring for the ps2 to validate as "original"
and a toc, with only a software reboot command tied to all the pad buttons.
my point only is "Magic Gate" has NOTHING to do with ANYTHING on the disc, data or otherwise, though they
did use different names for certain critical hardware drivers, for control over compatibility with "import"
hardware, the us hd tools b/s on my Japan consoles, and vice-versa because some identical driver has a
different name, so when it's called up by the eng name on the jap machine, it fails to load. That's not
magic gate software security, though, it's hardware cross compatibility security. None of those work on
my debuggers, either, they have thier own special hardware and supporting software, too.
right, MAGIC GATE. PS2 discs arent encrypted at all, you can browse them on your p/c, can you not? try
that with a dvd movie, or say, a GAMECUbE disc, those are encrypted discs, for hardware with no protection,
Sony went the opposite, the media is standard rom, universal disc format, and all that, the protection is in
THE CONSOLE, which is programmed to reject anything lacking that magic gate code, unless the disc contians a
folder called VIDEO_TS, in which case security is nullified, as is the ps2, since that's a dvd movie, and
the ps2 becomes a dvd player, in that case, as simple as that. My developers debugging consoles are in every
way identical to regular ps2's, with the primary differance bieng that they will disregard the absence of
the magic gate code if the primary volume label contians the word "MASTER", indicating that the recordable
is not a copy of a released title, but a mastered from scratch "original masterdisc", these are for the
industy insiders and in house, since the MAGIC GATE system is STAMPED into the discs, they HAVE TO make
SPECIAL consoles for use by themselves and the makers of their software, that have a loophole in MAGIC GATE.
Full guide covering most popular programs (Nero, CloneCD, Alcohol 120% recommended):
http://maxconsole.com/?mode=tutorials&feed=ps2&itemid=30
Alchohol 120%
Guide:
http://forum.alcohol-soft.com/index.php?showtopic=611
Software, Alcohol 120%:
http://www.alcohol-software.com/download.php?download_email=asd (alcohol 120%)
Lots of pictures of various chips
Installations by XEERO
Those professional installers over at divineo have put up some amazing pictures
davbere installations: ps2hd.com dms3.com dms3.com
PS2 Mods pictures thread
More pictures collected by me
ivc 2004 - ivc at x-pec.com